4 Diving Techniques Every Goalkeeper Must Know

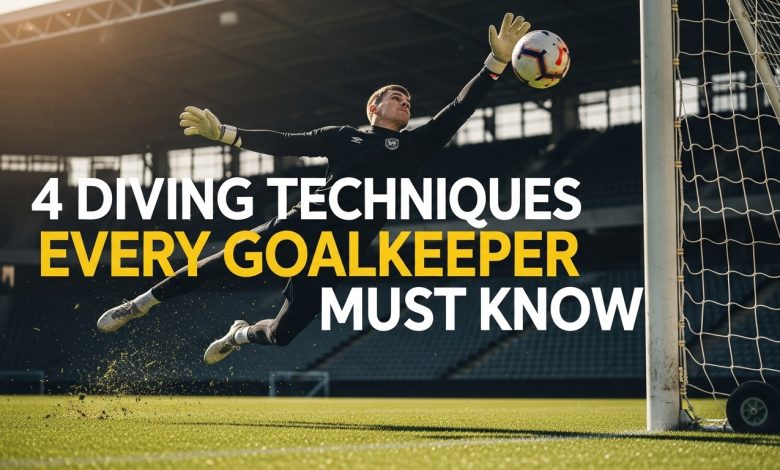
Ever wondered how the best goalkeepers make those impossible diving saves look so easy? Well, you can too, because in today’s blog post you’ll discover the four core diving techniques every good goalkeeper needs to know.
There are essentially four types of diving saves you need to master to become a great goalkeeper:
4 Diving Techniques Every Goalkeeper Must Know
The low dive.
The collapsed dive.
The high dive.
One more that I’ll reveal a little later in this post
But before we dive in, pun intended, let’s make sure that we always start in our keeper-ready stance, or as we goalkeepers call it, our set position. So get up on your toes with your knees shoulder-width apart and slightly bent. Have your hands relaxed in front of your body, and make sure that your body weight is forward by leaning forward just a touch.
And now that we’re all set, let’s break down the dives, starting with the low dive. One common mistake I notice a lot is goalkeepers starting their dive from a too high position. But you don’t want to do that, and here’s why.
When you dive from a high position to a low position, you can see that there’s a huge gap underneath my body, and this gap makes it easy for the ball to sneak through, especially if the shot takes a heavy deflection or an awkward bounce. Plus, you’re actually slower getting down for the shot and much more exposed to picking up those nasty elbow and shoulder injuries.
So instead of starting your dive from a high position, start low and then drive through that ball leading with your hands. This will help you reach the ball faster and give you a much better chance of saving those sneaky low shots.
Another common hiccup I see is goalkeepers diving backwards. When we dive backwards, we’re not only covering less of the goal, especially if the shots come from an angle, but even if we manage to get a hand to the ball, we’re much more likely to parry it into the goal rather than around it.
So instead, always aim to dive aggressively towards the ball by taking a solid forward power step. But as someone with nearly 20 years of elite goalkeeping experience, I know that diving forward isn’t always possible. There will be times when diving backwards is your only chance of saving that ball.
This is especially when the striker is close and we don’t have a lot of reaction time. But whenever you can, always aim to dive aggressively forward or at the very least in a straight line. That way, you’ll cover more of the goal and you’ll also parry those balls around your post and not into the net.
Another common slip-up I see with the low dive is goalkeepers not finishing their diving motion. Many goalkeepers tend to drop their elbows down to break their fall or to use their hand to hit after the ball. Doing this will not only lead to many more mistakes with the ball slipping in under you, but it’s also extremely painful for your elbows and can lead to more severe injuries like broken collarbones.
So instead of landing on your elbows or hitting after the ball, focus on gliding your lower hand out to create a smooth push-out motion. This will not only protect you from injuries, but it also forces you to get low and eliminate that all-important gap between you and the ground.
So let’s put all of this together and let me show you how to make the perfect low diving save. So always start in your keeper-ready stance, then you get low, you take a solid forward power step, then you lead with your hands, with your lower hand really close to the ground, like this.
And when you get to this point, it’s decision time. You can either grab the ball with one hand behind and the other one on top, but if you can’t catch the ball, you can parry it out to the side.
If you’re looking for ways to level up not just your diving game, but overall goalkeeping skills faster than you ever thought possible, then pause this video and check out the link in the description. But for now, let’s get back to one of my favorite diving techniques, the collapse save.
The collapse save is probably the dive that we use the most as goalkeepers, and we typically use it when the ball is close to our bodies, but it’s not quite close enough for a scoop save, and it’s not long enough for any of the extended diving techniques. It’s perfect for those shots aimed around the middle of the goal, but it’s also very, very useful for low shots and even bouncing shots.
One mistake many goalkeepers make is launching off both feet. What you want to be doing instead is to take a solid forward power step, and then stand and wait for that ball. If the shot is shot very low, then you need to have a low stance, but if the shot is higher, then you need to have a higher stance.
The collapse dive is all about balance, and performing it correctly gives you the best chance of catching those close mid-height shots securely. First, start by getting your body behind the ball with a step towards the side where the ball is headed, pointing your foot forward at an angle.
Make sure you firmly grip the ball using the W catching technique with your face and chin behind your hands and directly facing the ball as you catch it. Your shoulders should align with your knee, providing you balance and stability.
And when you dive, just go with the flow and use the ball to cushion your fall, followed by your hip and shoulder. To practice the collapsed dive, you can start by sitting on one knee with your other foot in a power step position. Now practice falling to the ground using the ball to cushion your fall.
Once you’re confident with your fall technique, stand up and bounce the ball to the ground. Take a power step, catch the ball, and smoothly follow through with your dive. You can also bounce the ball against the wall to simulate the exact same motion.
If you have a partner, have them throw a few mid-height balls to give you time to step and establish a strong power step before you dive. As you gain confidence with your power step, let your partner shoot the ball instead, adding more unpredictability to the ball’s trajectory.
Incorporate some of these drills into your training and you’ll soon be turning those tricky camera saves into more controlled and smooth catches.
And speaking of camera saves, let’s dive into those spectacular top corner saves we all dream about before falling asleep. To consistently make these top corner saves without injuring yourselves, you need to master the basics.
When you’re diving, you never want to dive off both feet because launching off two feet, you won’t generate enough power to reach that top corner. Instead, build power and isolate your plant foot by shifting weight from your off foot onto your power step.
To do that, you first need to lean slightly on your off foot and transfer that weight onto your power step. A great way to practice this weight shift is ski jumping drills. Simply jump sideways landing on one foot, pause briefly for stability, and focus on shifting your weight onto your power step before diving.
Just like with the low diving technique, another common mistake is starting the dive from a high position. If you think about it, why should we get low when we’re diving high anyways? Well, here’s why: because when you dive from high to low, it’s nearly impossible to reach those top corners.
So instead of diving like a dolphin, start your dive from a low position and then launch upwards and attack the ball at its highest point.
One of my favorite drills to practice the low to high technique is to start in a kneeling position, gently toss the ball up and forward, and then spring towards it as it bounces back up again. And hey, don’t forget about your arms. You need to swing them to add even more oomph to your dive because every bit of you should be aiming for that top corner.
As a rule of thumb, you should always aim high with your top hand and go long with your bottom hand. But always bring both hands for the dive, and then you can make that split second decision based on the shot.
Now that you know how to make those jaw-dropping top corner saves we all dream about, let’s discuss the most important part of the high diving technique: the landing. You never want to land on your elbows or your knees because frequent hard landing on these joints will shorten your goalkeeping career. So always, when you manage to catch the ball, use it as a pillow, letting it touchdown first to cushion your fall.
When you need to push the ball away, it’s important to turn your lower hand around so you land on the side of your elbow with your palm facing upwards. Before I reveal the not so common diving technique, I’d love to hear from you. Have I missed anything? Are there any special variations or unique drills that you like to do to improve your diving technique? Please let me know down in the comments. Sharing is caring and that’s how we all learn from each other.
Now let’s dive into our final technique. Look, if you’ve been following me for a while, you know that I’m a big believer in using my legs to save the ball, especially during 1v1s when the striker is really close and you’re just trying to cover as much of the goal as possible.
But while using your legs is great to block the ball, there are situations when we need to secure the ball with our hands. This is where the not so common leg removal diving technique comes into play.
This save works wonders in crowded penalty areas where you don’t want to give away any easy rebounds and is perfect for those awkward shots around your plant foot that aren’t quite close enough for a scoop save, but they’re not quite far enough for a collapsed dive either.
And to perform the leg removal technique correctly, perform the leg removal technique correctly, you need to take a negative step away from the ball to create that space for your dive. Instead of putting your foot down, remove both feet by almost kicking the other leg from underneath your body.
Now that you’re on your way down, use both hands to firmly catch the ball with one hand on the top and the other one behind the ball. As you make the catch, cushion your landing with the ball followed by your hip and your shoulder.
To practice this technique, you can place one ball in front of you and the other one on your side. Now, when I dive for that ball, I’ll forcefully kick that ball away with my other leg. Here’s how it goes: the only downside is that I now have to fetch the ball. I’ll be right back.
If you have a partner, you can position him around the six yard box and take shots aimed just beside your plant foot. He can vary the power and direction to perfect your timing and even mix in some bouncing shots to challenge your technique even further.
By adding the leg removal diving technique to your toolkit and using it at the right moments, you’ll significantly reduce the rebounds when dealing with those close range awkward shots. But none of these diving techniques that I’ve shown you today matter if you don’t know how to get back up again.


